On Boston University's men's crew team, we use a force curve monitoring system called Peach. Developed in Cambridge, England, it uses a system of strain gages and Hall effect sensors to measure a rower's force application on the blade throughout the length of their stroke. To monitor our force curves in real-time, so that we can adjust our stroke on the water, we use a monitor built by Peach Innovations. The monitor works well, but there is no mount to use for it even though it has two ribs with 5mm holes to attach a mount. Currently, we use velcro and a zip tie, but this isn't perfect as the monitor can be easily hit and ripped off the velcro.
One of the grad students on our team, Ethan Feldman, designed a mount to be 3D printed in Onshape (shown below). He sent the STL file to be printed by our school 3D printers in our enginering workshop building EPIC. They were printed in PLA, and we quickly found that the infill was too low and they were too brittle, as they would easily crack if you hit them with an oar handle. We also realized the PLA would degrade over time as it was exposed to UV light. For these reasons, we decided to find a new material.

Club 8A entry in the Head of the Charles 2024. I'm rowing seven-seat in the red hat.
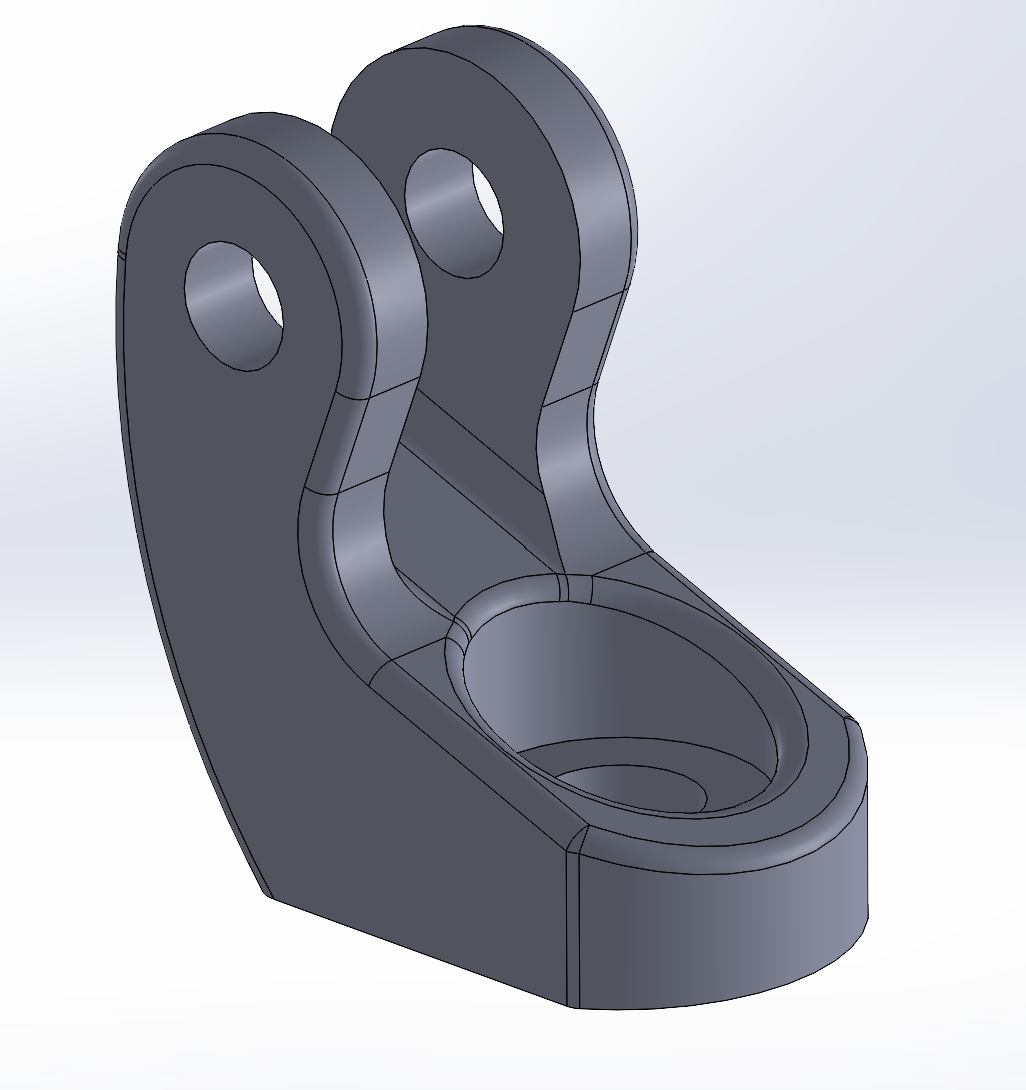
SolidWorks CAD
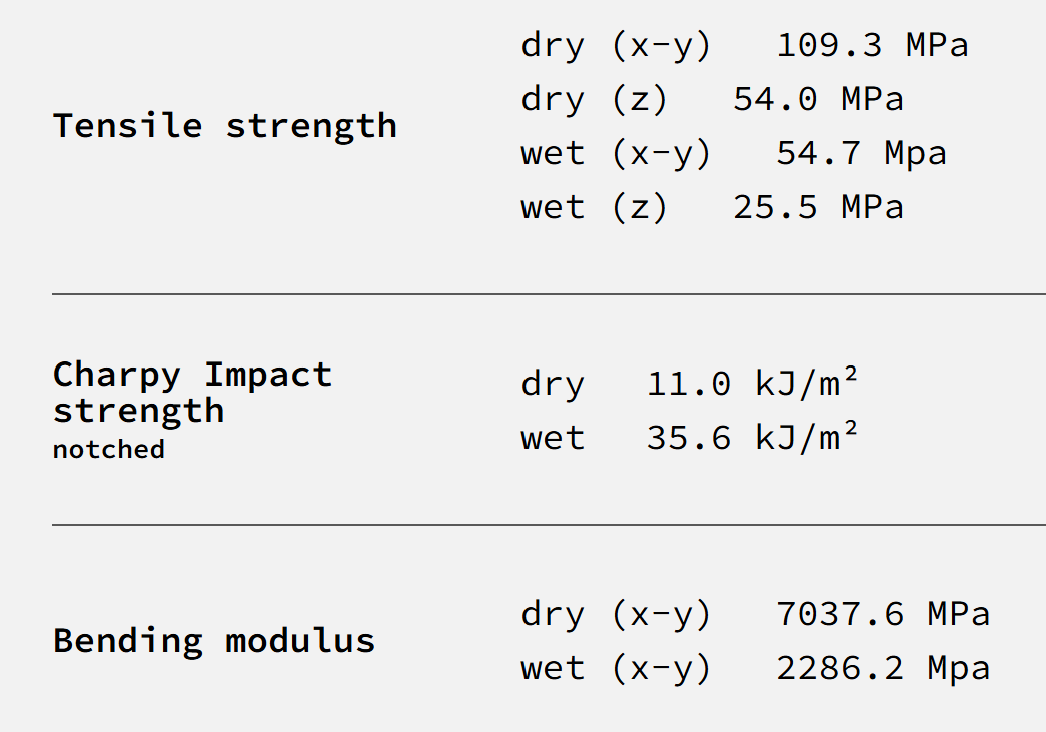
Polymaker Fiberon™ PA6-CF20 material properties
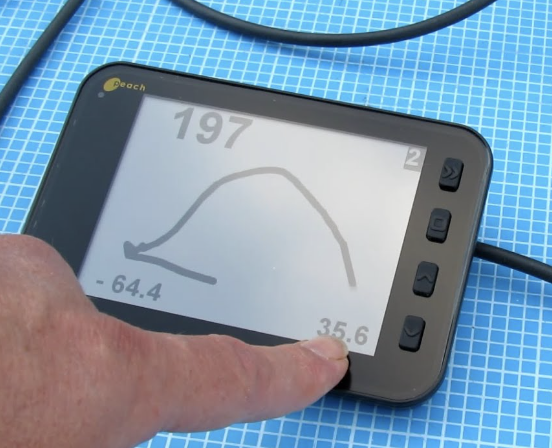
Peach monitor showing force curve, catch and finish angles, and power output
A little while after our first print I decided to get a 3D printer with money from my summer job. Bambu Labs was selling their A1 mini for $200 down from $300, and its performance could not be ignored. Now able to print my own parts I could choose a different material to print in. After some research, I landed on PETG and PA (Nylon).
PETG Tensile strength - 31.9 MPa in the XY direction and 13.4 MPa in the Z direction.
I had some extra PETG from my ME 360 motor speed control cart, and I did a test print of the part, but I found that the layers broke a little too easily. Nylon is known for having good layer adhesion, but I can't print it on my printer because it doesn't have a heated chamber meaning the part will warp and fall off the build plate. PA CF filament is exactly like regular PA, but it has carbon fiber strands infused in the filament. These strands increase rigidity, and tensile strength, and make printing easier because the highly thermal conductive carbon fiber strands spread heat evenly throughout the part preventing high thermal gradients which produce internal stress and warping. There is one problem with carbon fiber-infused filament, it can slowly cut away at stainless steel or brass print heads, so I head to replace my stock one with a hardened steel nozzle.
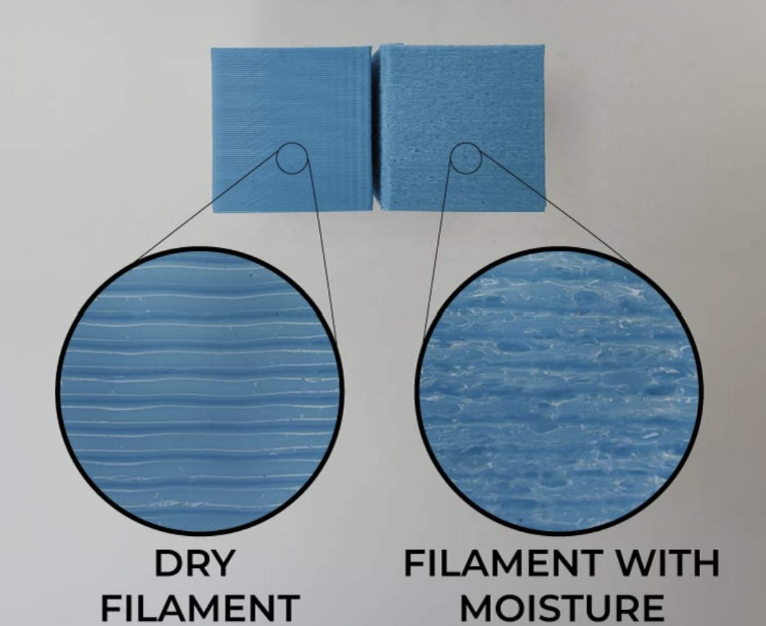
I got PolyMaker's Fiberon™ PA6-CF20 and did a couple of smaller test prints successfully, but still, larger test prints would warp and peel off the PEI print bed (shown below). I tried applying a glue stick to the bed but that had mixed results. Some online forums recommend Nano Polymer Adhesive made by Vision Miner, so I ordered a test batch. While waiting for the shipment I did another small test print, but this time I found that the filament was bubbling while it was coming out. I found that Nylon typically comes in two forms, PA6 and PA12. PA6 has a 6-long carbon chain and PA12 has 12. In addition, PA6 can easily absorb moisture that expands and creates air bubbles when it prints. I had PA6, so I needed to dry the filament before I printed with it. Creality's Space Pi filament dryer met my drying requirements, 65°C, and it was quiet so I could still keep my printing set up in my kitchen. Finally, with the Nano Polymer Adhesive, I was able to print the mount without a problem.

warped larger print

final mount in PA6 CF


final print setup

filament dryer
The Tensile strength of the PA6-CF20 is about 100 MPa compared to the PLA at about 50 MPa, so it's stronger, but I'm still worried about impact resistance as that is the main mode of failure. You don't want PA6 to be waterlogged when you print it, for the aforementioned reasons, but once the part is finished you can anneal it in boiling water to put it in a "wet" state. In this state, the Nylon loses about half of its tensile strength but it gains ductility and impact resistance. I printed another piece and after it was finished I boiled it in a pot of hot water for about an hour at 100°C. Once cooled down the part was noticeably more elastic, and it even made a less tiny sound when dropped.

wet on left, dry on right

Mount with screen, needs hardware still


I finished this project in winter and we don't row at this time of year, so I won't be able to test the mounts until after springtime when I will post an update with the results. I'm looking into using a special build plate, G10 or Garolite, the same material used in PCBs. Its micro pores in the fiberglass epoxy laminate allow Nylon to mechanically grip to the build plate meaning I wouldn't have to use the consumable adhesive. I originally wanted to print these parts without an enclosure because it meant I wouldn't need an expensive printer. After getting the filament dryer I realized I could easily use it to heat an enclosure to 80°C by simply opening it up and leaving it inside the enclosure. This would help prevent warping and it could even increase tensile strength as the different layers of Nylon would more easily fuse together.